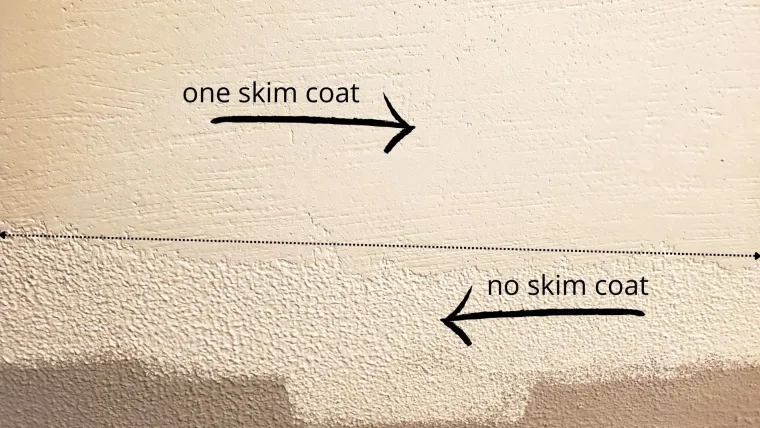
Looking to transform your Verde Valley walls from textured to smooth? Skim coating is the answer! This technique involves applying a thin layer of joint compound to conceal imperfections, unify uneven surfaces, and achieve a flawless finish. Whether you’re tackling outdated popcorn ceilings or aiming for a modern, minimalist aesthetic, skim coating can breathe new life into your space.
Choosing Your Weapon: Selecting the Right Joint Compound
The key to a successful skim coat lies in selecting the appropriate joint compound. Here’s a breakdown of the most common types:
- All-Purpose Joint Compound: This versatile option is ideal for most skim coating projects. It offers a good balance between workability and drying time, making it suitable for beginners. Verde Valley Handy Man or Verde Valley Property Maintenance can advise on the ideal brand and consistency for your specific needs.
- Lightweight Joint Compound: This option is easier to spread and dries faster, making it a good choice for larger walls or ceilings. However, it may require additional coats for complete coverage.
- Setting-Type Joint Compound: This fast-drying compound is perfect for patching small holes or cracks before skim coating. However, its rapid setting time necessitates a quicker application pace.
The Art of Skim Coating: Mastering the Technique
Skim coating requires meticulous attention to detail, but with the right approach, you can achieve stunning results. Here’s a step-by-step guide:
- Prep is King: As with any painting project, thorough preparation is paramount. Remove furniture and wall hangings. Clean the surface with a damp cloth to eliminate dust, dirt, and grease. Verde Valley Handy Man or Verde Valley Property Maintenance can expertly handle this step for you.
- Patch Up the Past: Address any cracks, holes, or uneven areas with setting-type joint compound. Let it dry completely before sanding smooth.
- Prime Time: Apply a coat of stain-sealing primer to the wall. This strengthens the surface and promotes better adhesion of the joint compound.
- Mixing Matters: Following the manufacturer’s instructions, mix your chosen joint compound to a creamy consistency. Avoid over-mixing, as it can introduce air bubbles.
- Apply and Smooth: Using a taping knife, apply a thin layer of joint compound to the wall in small sections. Work in a diagonal motion, maintaining a consistent pressure for even application. A wide taping knife (around 12 inches) is ideal for larger areas.
- Feathering the Finish: Once applied, use the taping knife at a low angle to gently feather out the edges of the compound, creating a seamless transition between the coated and uncoated areas.
Beyond the Basics: Advanced Techniques
For more intricate projects, consider these advanced techniques:
- Using a Roller for Large Areas: For expansive walls, a nap roller loaded with a thin layer of joint compound can expedite the application process. However, this technique requires a follow-up with a taping knife for smoothing and feathering.
- Two-Coat Approach: For deeper textures or uneven surfaces, a two-coat approach might be necessary. Apply a thin first coat, allow it to dry completely, then sand smooth before applying the final skim coat.
Safety First: Don’t forget to wear safety glasses and a dust mask while sanding to protect yourself from particles.
Skim Coating Success with Verde Valley Expertise
Skim coating can be a rewarding DIY project, but for a guaranteed flawless finish, consider enlisting the services of Verde Valley Handy Man or Verde Valley Property Maintenance. Their experienced professionals possess the expertise and tools to ensure a smooth, professional-looking result. They can also handle larger projects, saving you time and effort.
So, ditch the dated textures and embrace the beauty of smooth walls! With the right preparation, technique, and perhaps a helping hand from the Verde Valley pros, you can transform your space into a modern masterpiece.
